How to Find MAC Address on Windows 10?

There are multiple methods you can use to find the MAC Address on Windows 10. Two standard methods are using the Windows command prompt and the GUI application “Network and Sharing Center”.
Let us explain both methods individually.
1. Using Windows 10 Command Prompt
To find your device's MAC Address using Windows 10 command prompt, do the following:
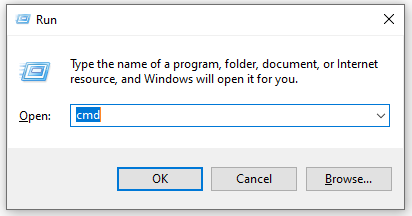
- Once you have the run window opened, type in “cmd” and click “OK”.
- Open the command prompt. This can be done via the shortcut key “Windows+R”. You can also access it by performing a manual search.
- As you see the “cmd.exe” window opened in front of you, type in the command below and hit “Enter”.
|
ipconfig /all |
- Once you see the results against the command, look for the “Physical Address” in it. The values in the physical address are actually your MAC address.
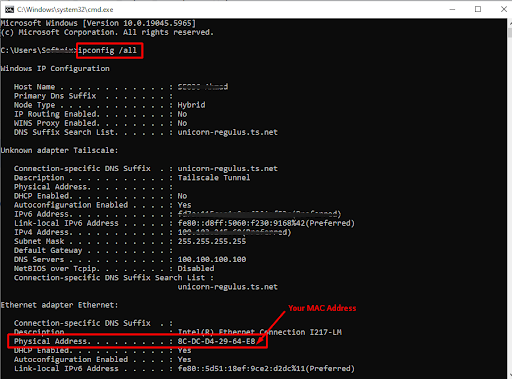
** The above MAC Address is for the wired connection, as you can see it lies in the “Ethernet adapter Ethernet”. If your device is connected to a Wi-Fi network, look for the “Physical Address” under the Wi-Fi section.
Using the values next to the “Physical Address,” you can perform the MAC address lookup and get details related to the manufacturer/vendor.
2. Using Network and Sharing Center
To find your MAC address in Windows 10 via the GUI application “Network and Sharing Center,” follow the steps below:
- Right-click on the network icon in the system tray on the right side of the Windows taskbar.

- Next, click “Open Network & Internet Settings”.

- As the settings appear on your screen, click on “Network and Sharing Center”.
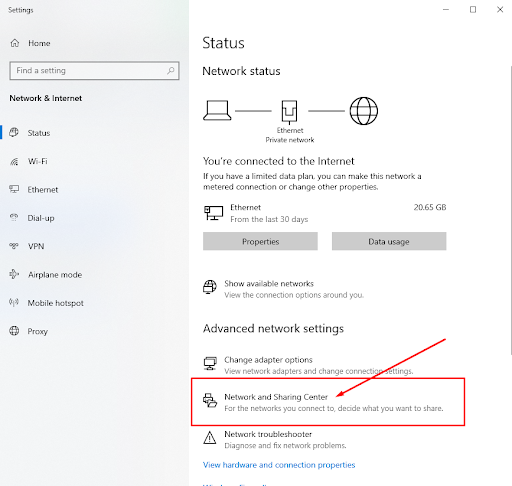
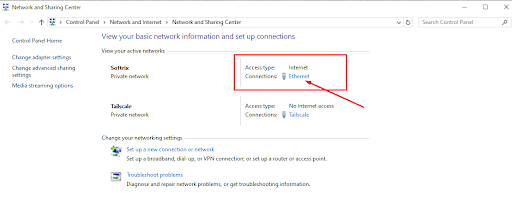
- Next, under “Access type,” you will see connection. Select the one to which your device is connected. In our case, it’s “Ethernet,” so we are gonna click on it.
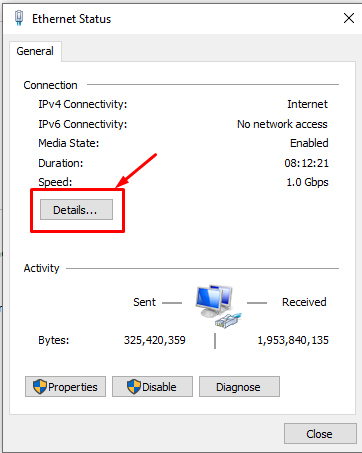
- Once Ethernet Status appears in front of you, click on the “Details” button.
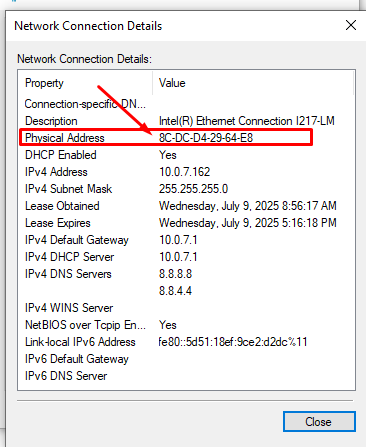
- Inside Network connection details, look for the property “Physical Address”. The values in front of it are actually your MAC address.
This is how you can find the MAC address on Windows 10.